


Hello friends,
I am very grateful to share my first project with you as one of the brand ambassadors of 2022/2023.

This is one of the front sides of the box, the album is inside. I love to spend time creating layers and details on the top of a project, in this case, the surface of the box. I cut the frame out of a piece of chipboard, then wrapped it up with 8” x 8” “Ocean quest” in the collection. So it gives a lot of space to layer up the other paper elements.
The other side of it


the two narrow sides


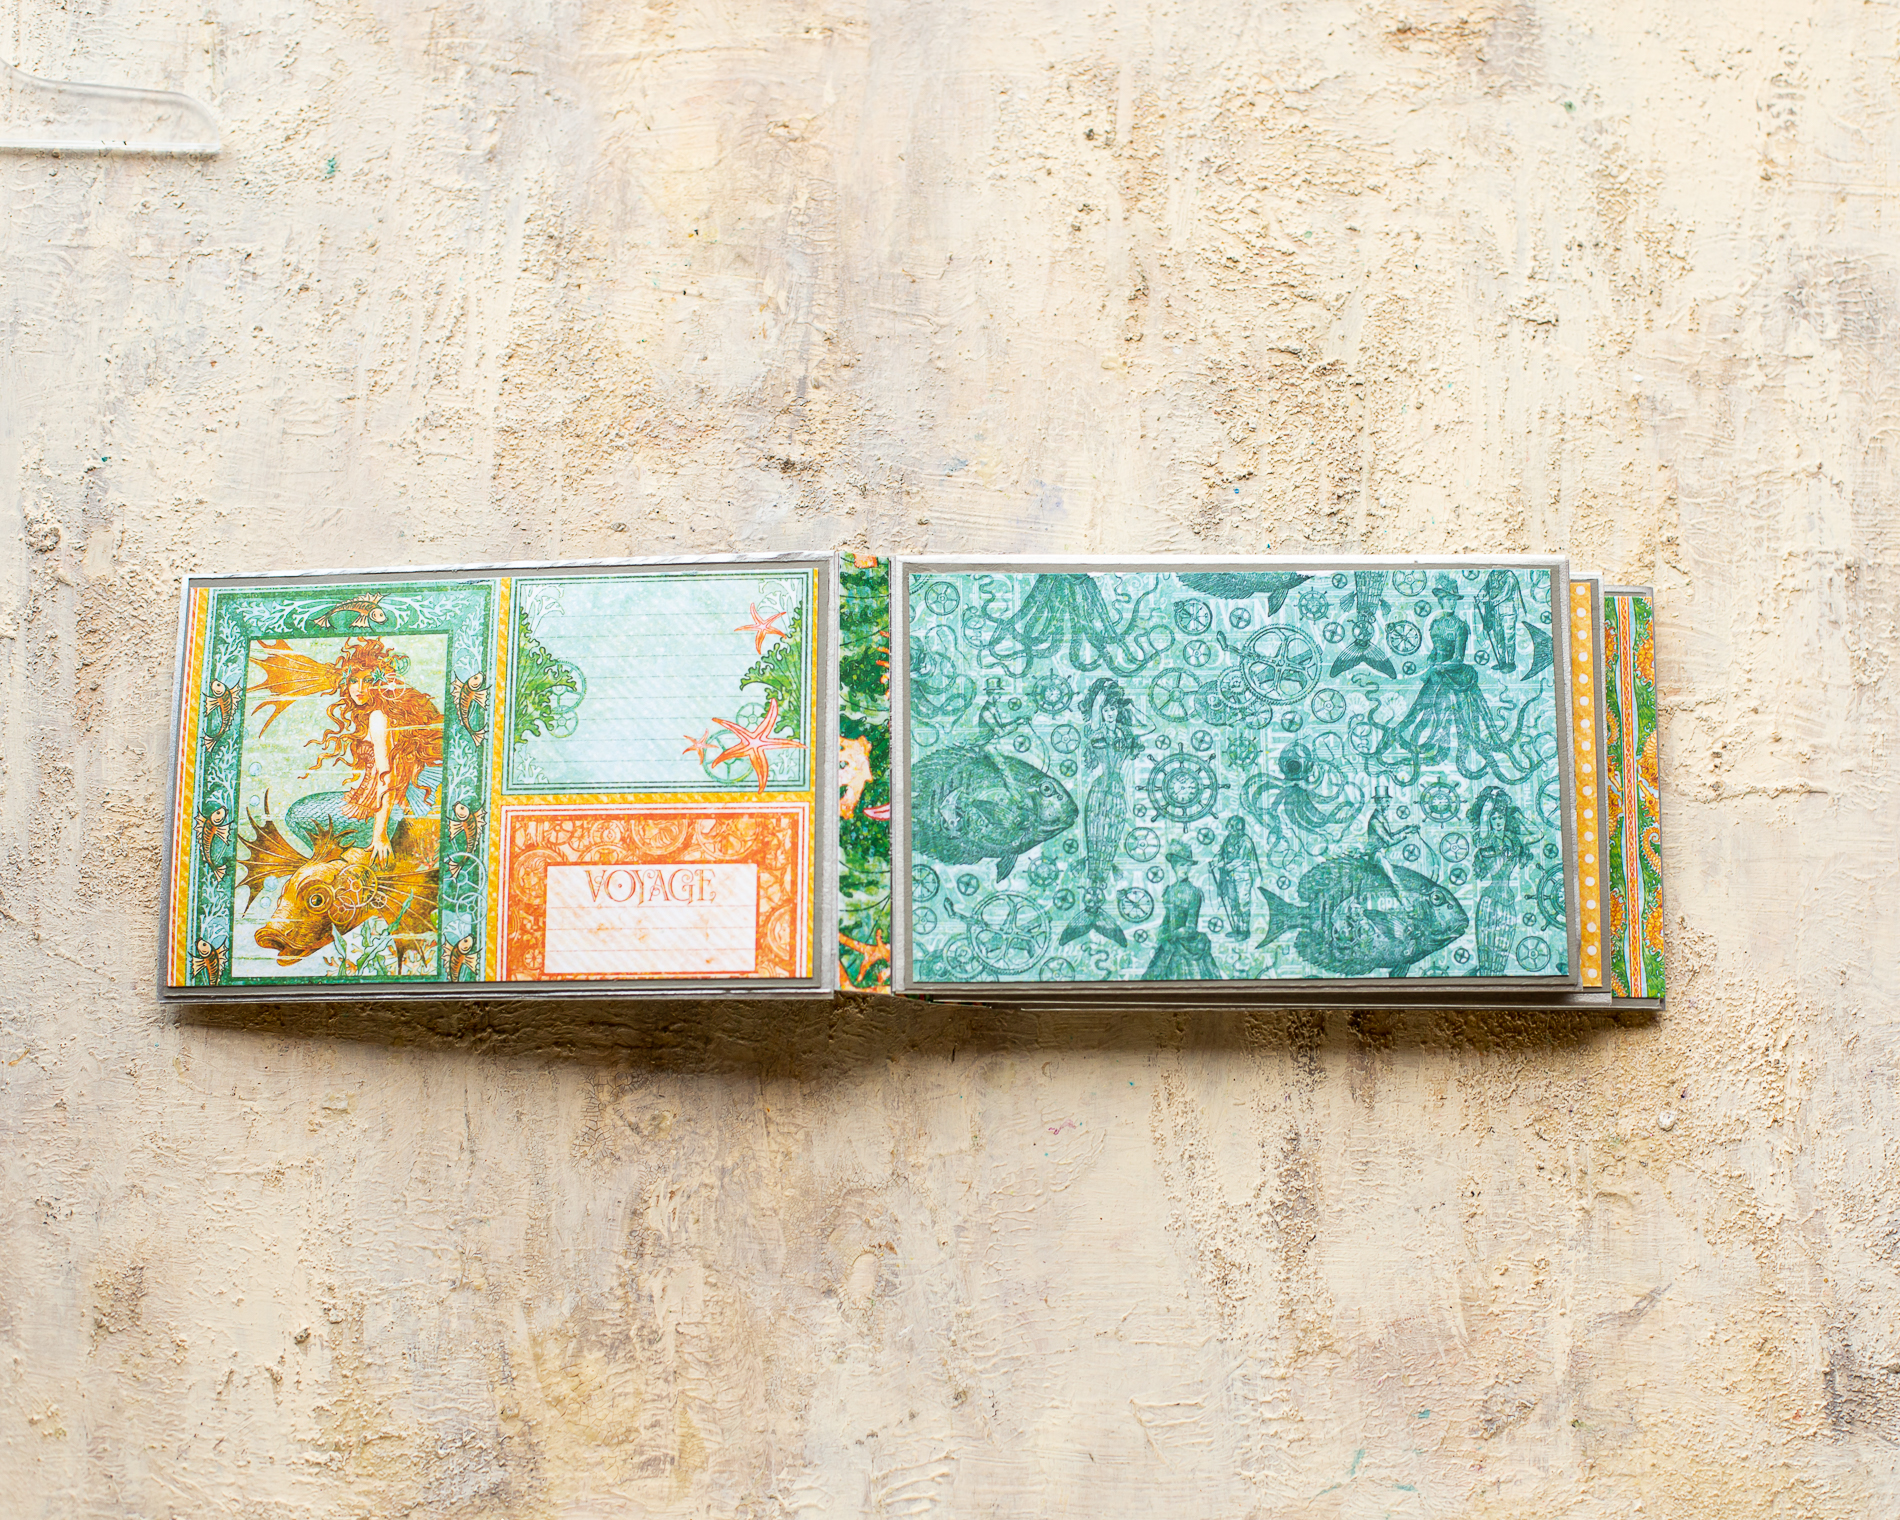
As you can see I have used the “Voyage beneath the sea” collections to create it . I love love stories of mermaids and also a bit of the mechanical tone of this collection. Have you noticed the cute little claw feets of the box ? it will tell you my deep love for all things mixed media !

I wanted the claw feet to look ancient and well used, so I used a bit of chalky paint to paint it in white, then rusty green. Then I added a thin layer of gold wax on top for finish touches.
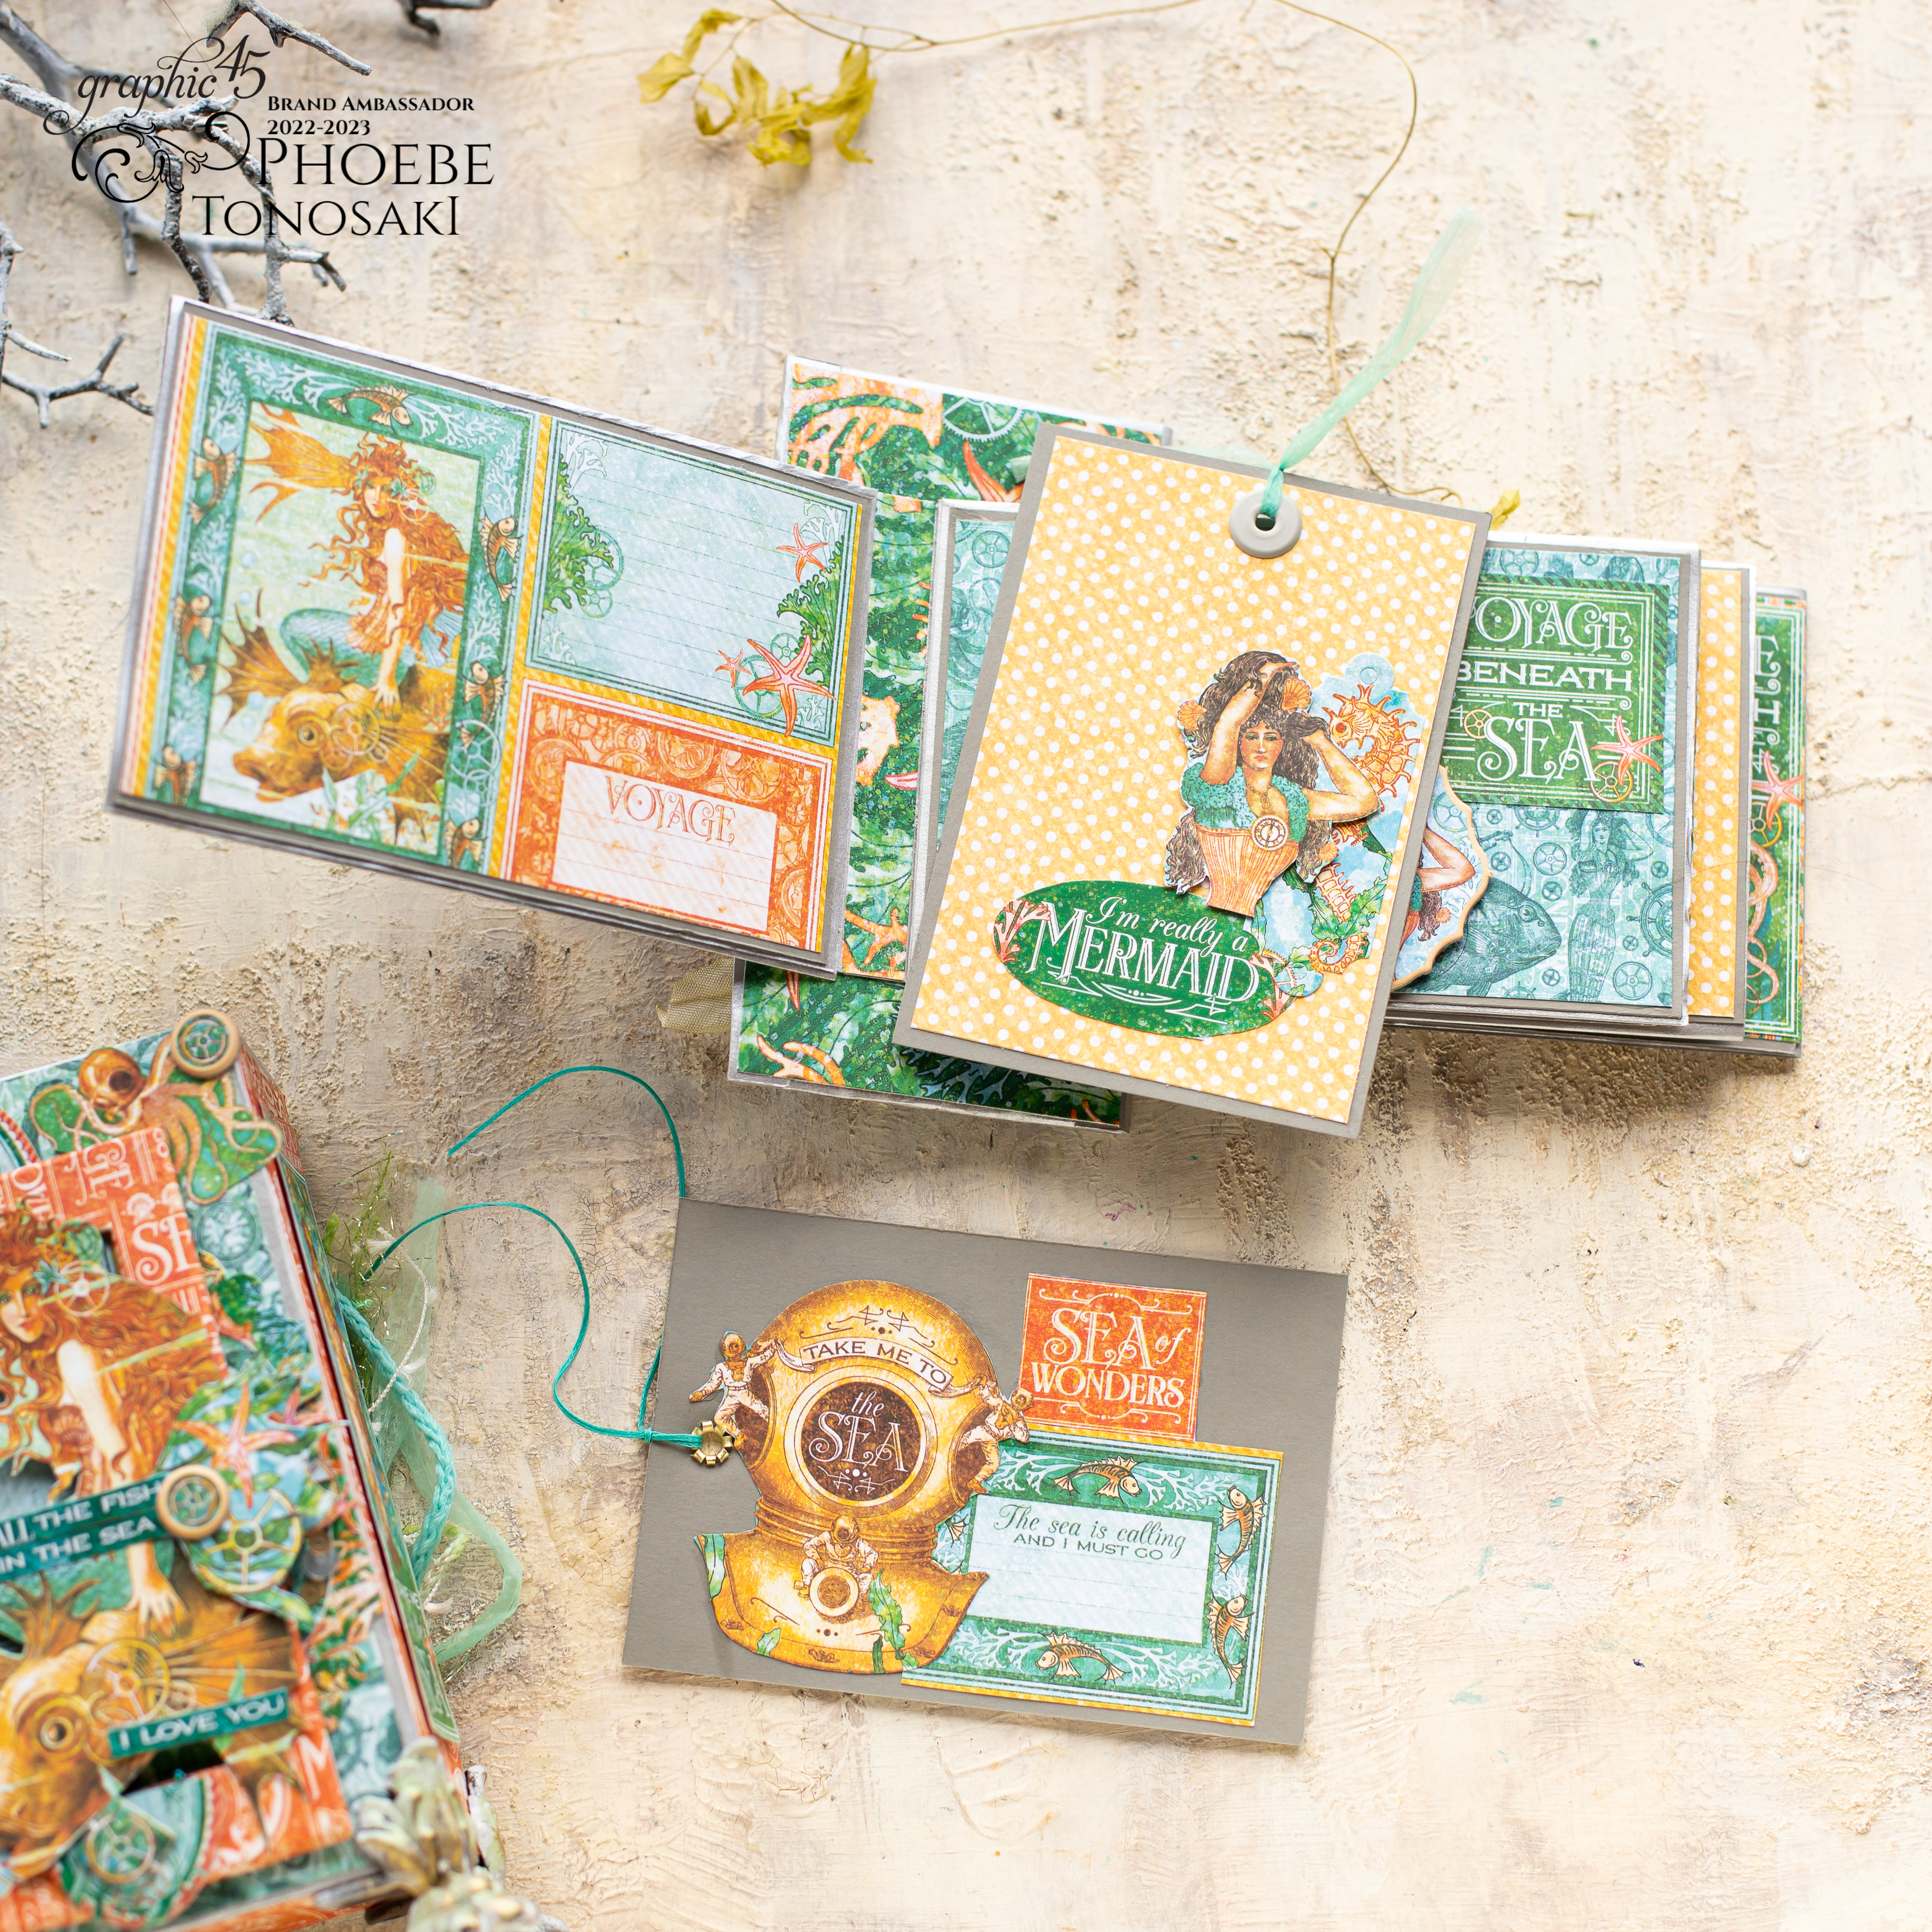
Now let me show you the insides of the album.


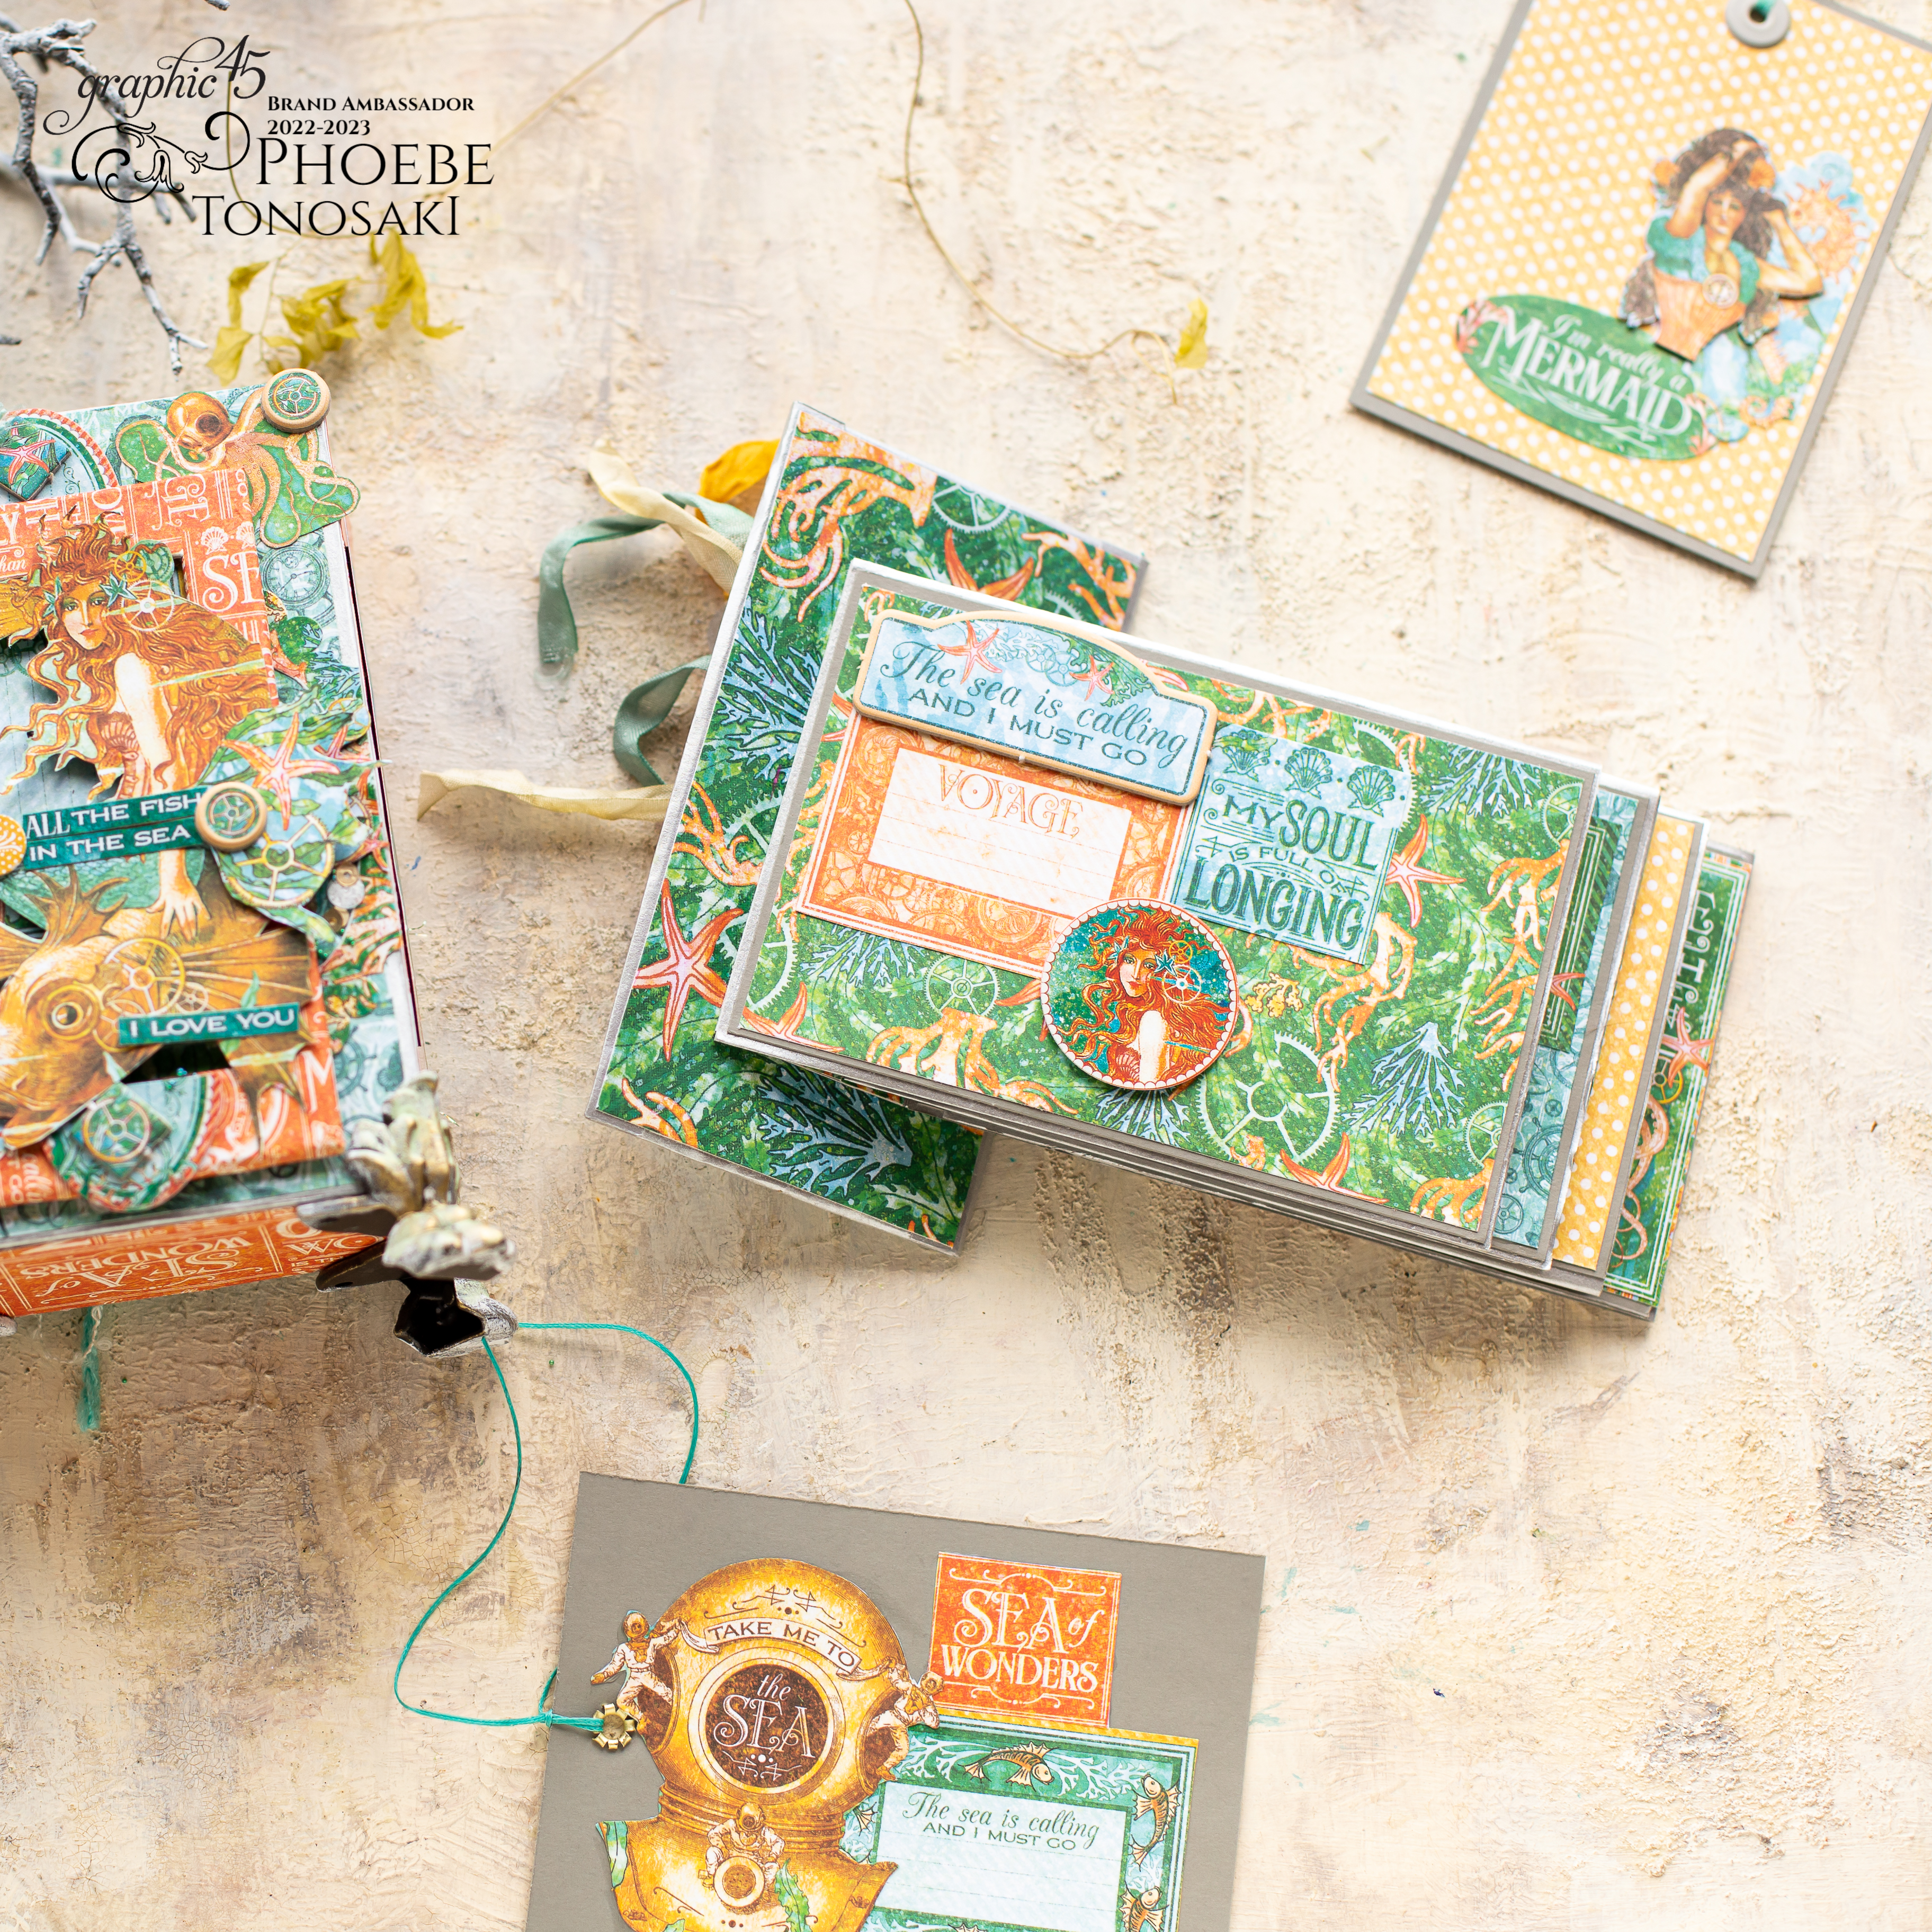
Because I always want my projects to be able to be sent as a gift, so it is not too oversized, tiny enough to hold in a hand but also has enough elements to fill in personal memories and photos. It has a total of 4 pages, two tags, pockets and photomats!
You can also find a short flip through video in my instagram if you are interested.
Firstly, please get your material ready:
Supply List:
Voyage Beneath the Sea Deluxe Collector's Edition
Voyage Beneath the Sea 8x8 Paper Pack (Limited Edition)
Antique Brass Claw Feet
Chipboard
Silver cardstock
Gray heavy weight cardstock
Colored thread and seam binding
eyelets
Foam tape
Now let me explain the steps by steps of how to create this cute decorative project.
1)Cut chipboard into the correct sizes -
4" x 6" 2pcs (wide sides of the box)
2" x 6" 2pcs (narrow sides of the box)
2" x 4" 1pc (bottom of the box)
3" x 5.1/2" 1pc (lid)

1" x 4" 2pcs (wide sides of the box)
1" x 2" 2pcs (narrow sides of the box)

3)Cut the follow sizes with silver cardstock , score and fold in 1/2", then use the stripes to bind the insides of the chipboard
1" x 6" 2pcs (wide sides of the box)
1" x 4" 2pcs (narrow sides of the box)
1" x 2" 2pcs (bottom of the box)


4) On the last piece of chipboard(2" x 6") , do not glue the sides first (6"), glue the design paper inside the box first

Size for the design papers. Here I used paper from Voyage Beneath the Sea 8x8 Paper Pack (Limited Edition)
3.3/4" x 5.3/4" 2pcs (wide sides of the box)
1.3/4" x 5.3/4" 2pcs (narrow sides of the box)
1.3/4" x 3.3/4" 1pcs (bottom of the box)


5) Only then we can finish gluing the insides of the box. We will create the same silver cardstock stripes to bind the outside of the box and lid
1" x 6" 4pcs (wide sides of the box)
1" x 4" 2pcs (narrow sides of the box)
1" x 2" 2pcs (bottom of the box)
1" x 5.1/2" 2pcs(lid)
1" x 3" 2pcs(lid)


6) Cut design paper and glue on the surface of the box and lid
4" x 6" 2pcs (wide sides of the box)
2" x 6" 2pcs (narrow sides of the box)
2" x 4" 1pc (bottom of the box)
5.1/2" x 3" 2pcs(both sides on the lid)


7) Create the hinge of the album with silver cardstock in these sizes:
2.1/2" x 3.3/4" 1pc, score at 1/2", 1", 1.1/2" and 2"
1.1/2" x 3.3/4" 1pc, score at 1/2", 1"

8) Glue the smaller silver cardstock in 7) to the center of the bigger one, as in the photo.

9) Cut silver cardstock at these sizes:
a)8" x 5.3/4" 4pcs, score and fold at 1/2" and 4.1/4", Attach the 1/2" to the other side of the cardstock
b)3.3/4" x 6" 2pcs, score and fold at 1/2"

10) Glue the 9b) to any 2 of the page created with 9a)

11) Add design paper on the top of all 4 pages, size is 3.1/2" x 5.1/2" 12pcs
Here I added a layer of gray heavyweight cardstock on the base to strengthen the pages , size is 3.5/8" x 5.5/8" 12pcs. Add design paper on the hinge 1/2" x 3.3/4"


12) Attach the album to the Lid as spine .

I hope you like my first project . I am looking forward to hearing from you. Come visit me and say hi !