Hello, today I am sharing my DT inspiration for Snip Art
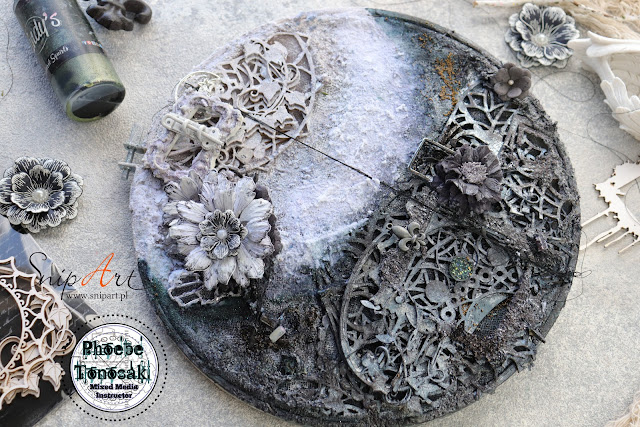
I made an embroidery hoop into a scene of eclipse!
I made an embroidery hoop into a scene of eclipse!
今日は簡単なチュートリアルで Snip ArtのDT作品をご紹介します!
刺繍枠で白黒の色合いでエクリプスを表現する作品となります。
Snip Art chipboard created beautiful layers,
perfect to be painted in black and white.
Snip Artのチップボードでレイヤーを重ね、
白と黒をそれぞれ綺麗に見せることができました。
to emphasize shadow and light
特に光と影を強調したかったです
Here is how I made this project:
以下はチュートリアルになります。
First, I used several layers of fabric for the base of the embroidery hoop.
まずは空の刺繍枠のベースとして綿100%の生地を重ねました。
then I started decorating it with different Snip Art Chipboard.
The list will be shown at the bottom of this post.
The more layers you add,
The more layers you add,
the more depth it will give when adding colors afterwards.
それからは少しずつ Snip Artのチップボードを貼っていきます。
今回使ったチップボードのリストはこの記事の一番最後に載せてあります。
チップボードを重ねれば重ねるほど
あとで着色するときに、深みのある作品になりますし、
I gessoed over the whole surface.
and added texture paste on random area.
全面をジェッソーでカバーしました。
テクスチャペーストもランダムに入れました。
After dried, I added color with Lindy's Gang sprays
乾いたらLindy'sGangのスプレーで着色しました。
finally I added flowers and other embellishments,
micro beads for finish up
最後にペーパーフラワーとエンベリ、マイクロビーズなどつけて
完成です。
Here is the list of Snip Art Chipboard I have used.
こちらのチップボードを使いました。
I hope you like this project !
いかがでしょうか?


